
Making a film score may seem like a daunting task, so here are some beginner tips to make the creative process go smoothly.
by Dante Fumo of SoundFly
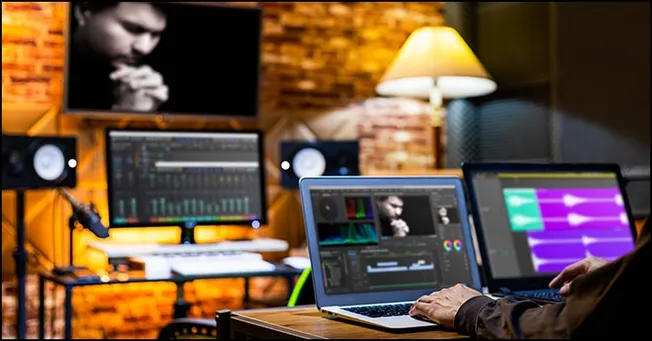
So, you’ve gotten a gig scoring your first film or video project. Congrats!
At this point, you’re probably full of ideas and eager to get started, but first you need to set up your DAW for scoring. There are several differences between a DAW session for a film score and one for standalone music-making.
This short guide will walk you through the steps to set up your session correctly so you can spend more time on the creative part without running into technical hurdles later on.
Frame Rate and Timecode
If you’ve never worked with video before, there are two terms you should know before diving in: frame rate and timecode.
Frame rate is the video equivalent of sample rate in digital audio, but in this case, it’s measuring how many pictures you’re seeing per second. You don’t need to know everything about frame rates and the many different standards that exist; just be sure to check the frame rate of the video you’re given to work with.
Timecode is a standardized way of measuring runtime established by the Society of Motion Picture and Television Engineers (SMPTE). It includes hours, minutes, seconds, and frames; and it looks like this: 01:30:22.10 (one hour, 30 minutes, 22 seconds and 10 frames).
The video you’re given to work with will most likely have a running timecode counter imprinted at the top or bottom of the frame. If it’s not there, ask the filmmaker to render a version with timecode baked in — they should know what this means.
Importing Video and Configuring Project Settings
When setting up your DAW session, it’s crucial to make sure your project settings are configured correctly. If you’re working with the wrong settings, your music may become unsynchronized when the filmmaker imports it into their own software, causing it to sound slower or faster than you intended.
To set up your DAW session, first import the video file, making sure to copy it into the project folder. If the video contains an audio track, make sure that imports successfully as well. Then, navigate to your project settings or preferences and do the following:
- Set the project frame rate to match the video (some DAWs will automatically detect this, while others will require you to enter it manually)
- Set the audio sample rate to 48 or 96 kHz (48 kHz is the most common standard for film, although some composers choose to work at higher sample rates)
- Set the project bit depth to 24 bits (this is usually the default setting, but it’s a good idea to double-check)
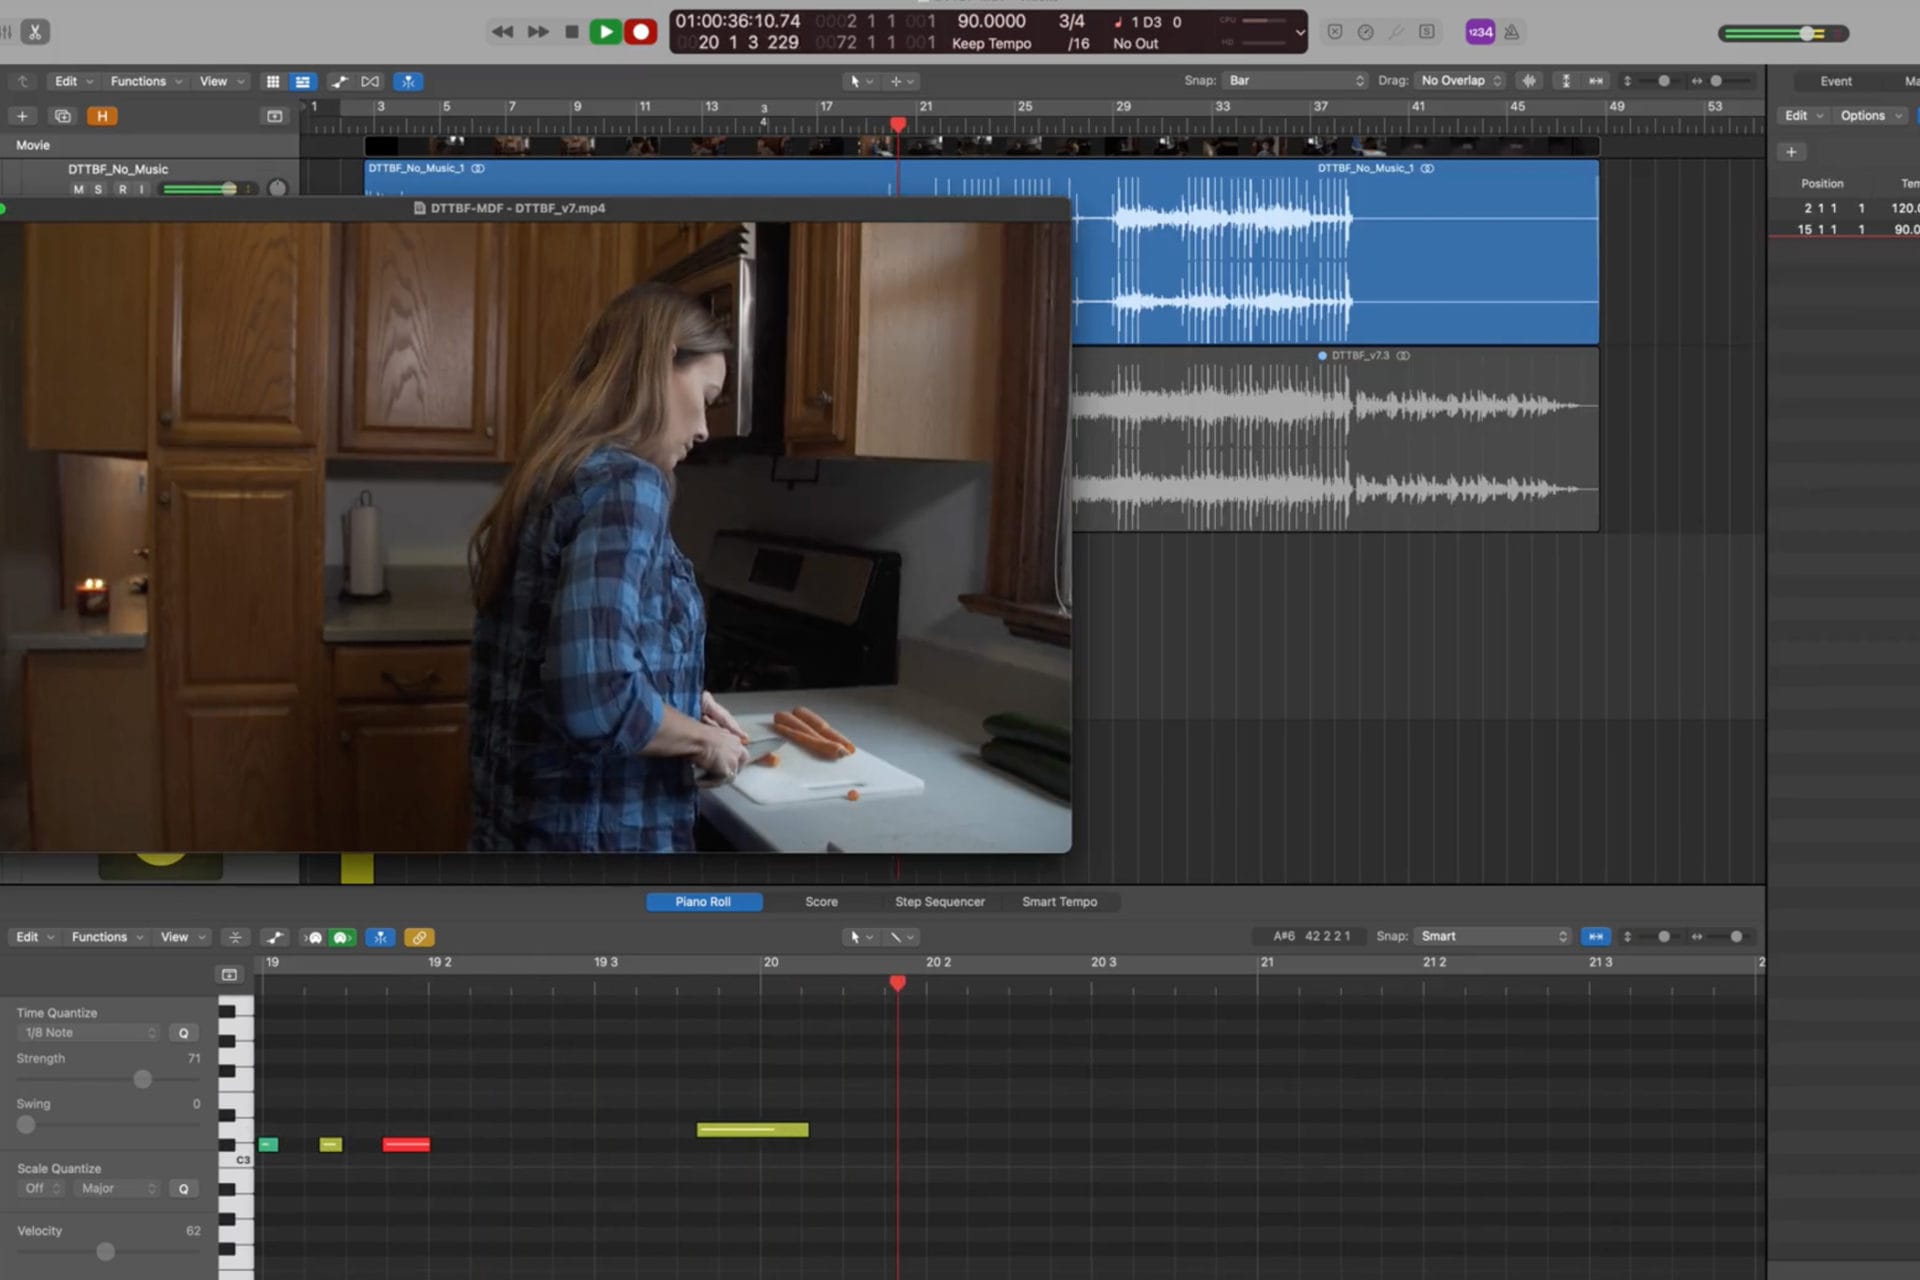
Verify Timecode Sync
Once your video is imported and your project settings are configured, you’ll need to verify that your DAW’s timecode is synced up with the video.First, look for the timecode counter at the top or bottom of the video. At the very beginning, it should read 00:00:00.00, but many picture editors choose to start the film at 01:00:00.00 to accommodate pre-roll content such as a countdown or test tones.
Next, set your project’s timeline to display timecode instead of the default view (usually minutes and seconds or bars and beats). If the video starts at 01:00:00.00, refer to your DAW’s instruction manual for how to adjust the start of the timeline.
Once the timeline is set up properly, you can verify timecode sync by jumping to random points in the video and seeing if the video timecode matches your timeline. If it’s off by even one frame anywhere in the video, go back and double-check your project settings.
+ Read more on Flypaper: “Orchestral MIDI String Libraries Compared.”
Setting Up Routing and Stems
If everything’s looking good so far, it’s time to set up your channel routing.These steps will be mostly the same whether you’re working in stereo or surround sound, except for the number of channels. If you’re working with surround sound, make sure your DAW output bus is set to six channels for 5.1 or eight channels for 7.1.
Then, make sure these outputs are routed to your audio interface in the correct order so that each channel plays out of the correct speaker.
Now, create a track called “Music Stem” in the same format as your main output. All of your music tracks must be routed to this track in order to separate them from the video’s audio. Then, create as many stems as you think you’ll need, again using the same format as your main output and music stem. If you’ll be delivering your music to a mixer, they may ask for stems of each instrument group (strings, brass, percussion, etc.) as well as reverb and other effects.
Finally, create several stereo and mono instrument tracks so they’re ready to go when you need them. Route the output of each to its respective stem.
Setting Up a Tempo Track
The final crucial step is to set up your tempo track. Film scores often change tempos for each cue to match the timing of each scene and keep pace with the rhythm of the film. To do this effectively, you’ll need to set up tempo and time signature changes on the tempo track. Different DAWs handle this in different ways, so be sure to read the manual or look up a tutorial before you start.
Start by setting your project tempo to something that works for the first scene. Then, when you need to change the tempo, create a tempo change marker on the tempo track. If you want to hit a cut on the beat, it may take some trial and error to find the tempo that lines up just right.
You can also use time signature changes to bridge the gap when there’s a pause in the music — for example, you might add one bar of 7/4 in between sections of 4/4 time. You can also do this by automating the tempo to slow down or speed up as needed.
On to the Fun Part…
Congratulations on setting up your film scoring session — now, you can move onto the creative part!
By putting in the time to set things up right, you’ll be able to use the creative part of your brain to write the best score you can, without worrying about the technical details. And if you want to learn more and dive deeper into the process of film scoring, you’ve got to sign up for our new course,Intro to Scoring for Film & TV.